Introduction
Transferring data between iPhones can be seamless if you follow the right practices. This guide covers the best methods for iPhone data transfer, ensuring that all your important information, from contacts to apps, moves smoothly to your new device.
Preparing for Data Transfer


Backup Your Data
Before transferring your data, it’s crucial to back up your current iPhone:
- iCloud Backup: Go to Settings > [Your Name] > iCloud > iCloud Backup and tap Back Up Now.
- iTunes Backup: Connect your iPhone to your computer, open iTunes, and select Back Up Now.
Ensure Software Updates
Make sure both your old and new iPhones are running the latest iOS version:
- Update iOS: Go to Settings > General > Software Update to check for updates.
As you prepare for a smooth data transfer, explore how to use your iPhone for digital health and fitness tracking to ensure your health data transfers seamlessly and stays up to date on your new device.
Methods of Data Transfer

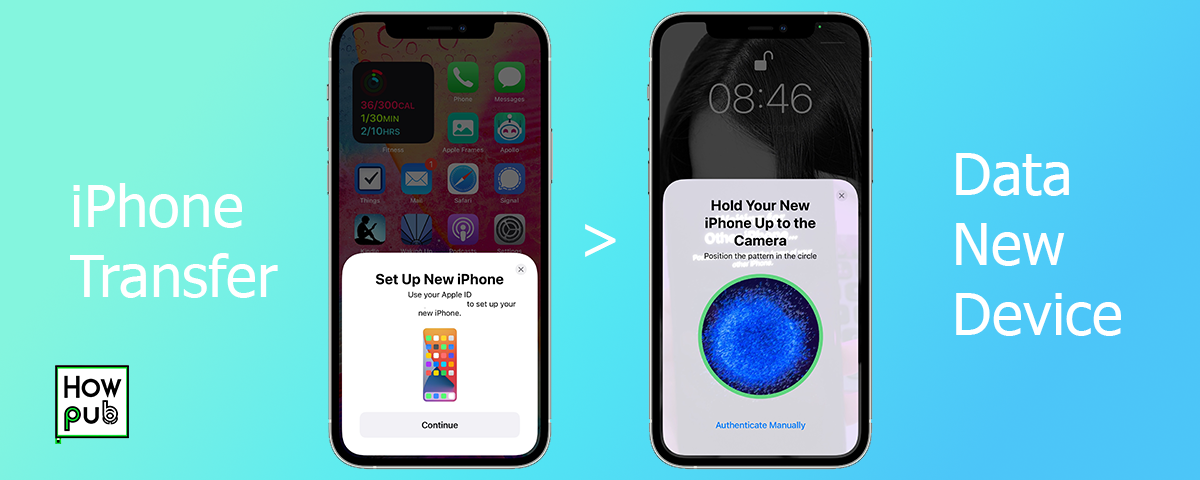
Using Quick Start
Quick Start is an efficient way to set up your new iPhone using your old one:
- Place Devices Nearby: Keep your old and new iPhones close to each other.
- Start Quick Start: Follow the on-screen instructions on your new iPhone.
- Use Camera: Use your old iPhone’s camera to scan the animation on your new iPhone.
- Transfer Data: Complete the setup process to transfer data.
iCloud Transfer
Use iCloud to transfer your data wirelessly:
- Backup to iCloud: Ensure your old iPhone is backed up to iCloud.
- Set Up New iPhone: During setup, choose Restore from iCloud Backup.
- Select Backup: Choose the latest backup from your old iPhone to restore.
As you transfer data to your new device, explore the different iPhone dimensions and sizes to ensure your new iPhone fits perfectly with your needs.
iTunes or Finder Transfer
Transfer data using iTunes (or Finder on macOS Catalina and later):
- Backup with iTunes: Connect your old iPhone to your computer and back it up using iTunes.
- Restore to New iPhone: Connect your new iPhone and select Restore Backup in iTunes.
Transferring Specific Data
Contacts and Calendars
Ensure your contacts and calendars are transferred:
- iCloud Sync: Go to Settings > [Your Name] > iCloud and enable Contacts and Calendars.
- Email Accounts: Make sure your email accounts are set up on your new iPhone to sync contacts and calendars.
As you transfer your contacts and calendars, learn how to set up Emergency SOS and Medical ID to ensure your new iPhone is ready for any emergency situations.
Photos and Videos
Keep your memories safe by transferring photos and videos:
- iCloud Photos: Enable iCloud Photos in Settings > Photos to sync all your media.
- Manual Transfer: Use AirDrop or a computer to manually transfer photos and videos.
Apps and App Data
Transfer your apps and their data:
- App Store: Download your apps from the App Store on your new iPhone.
- iCloud Backup: Restoring from an iCloud backup will automatically reinstall apps and their data.
Troubleshooting Data Transfer Issues

Common Issues
Resolve common data transfer issues:
- Insufficient Storage: Ensure you have enough iCloud storage or local storage for backups.
- Connection Problems: Check your Wi-Fi and Bluetooth connections if using Quick Start.
- Incomplete Transfers: Retry the transfer process if data is missing or incomplete.
As you transfer your photos, videos, and apps, explore how to adopt a greener lifestyle with your iPhone to make your device usage more environmentally friendly.
Contact Support
For persistent issues, contact Apple Support:
- Apple Support App: Use the Apple Support app for assistance.
- Visit Apple Store: Schedule an appointment at the Apple Store for in-person help.
Conclusion
Transferring data between iPhones doesn’t have to be complicated. By following these best practices and using the right methods, you can ensure a smooth transition to your new device.