Introduction
The iPhone has evolved into a powerful tool for videography, equipped with advanced camera technology and video recording capabilities that rival traditional cameras. With the right techniques, accessories, and apps, you can produce professional-quality videos directly from your iPhone. This guide will walk you through the essential steps and tips for using your iPhone as a professional videography tool.
Step 1: Mastering iPhone Camera Settings for Videography
Understanding and optimizing your iPhone’s camera settings is crucial for capturing high-quality video.
How to Adjust Camera Settings for Video Recording


-
Open the Camera App:
- Launch the Camera app from your iPhone’s Home screen.
-
Switch to Video Mode:
- Swipe left or right to switch to Video mode. You can also choose Slo-mo or Time-lapse depending on the type of video you want to shoot.
-
Adjust Resolution and Frame Rate:
- Go to Settings > Camera > Record Video to choose your desired resolution and frame rate. For professional-quality video, select 4K at 30 fps or 4K at 60 fps. Higher frame rates like 60 fps are ideal for smoother motion, while lower frame rates like 24 fps give a cinematic feel.
-
Enable HDR Video:
- For enhanced dynamic range, enable HDR Video under Settings > Camera. This setting captures more detail in both bright and dark areas.
-
Lock Focus and Exposure:
- Tap and hold on the screen to lock focus and exposure. This ensures that your video remains consistent, even if the scene changes slightly.
-
Use Gridlines for Composition:
- Enable gridlines by going to Settings > Camera > Grid. Gridlines help you apply the rule of thirds for better composition.
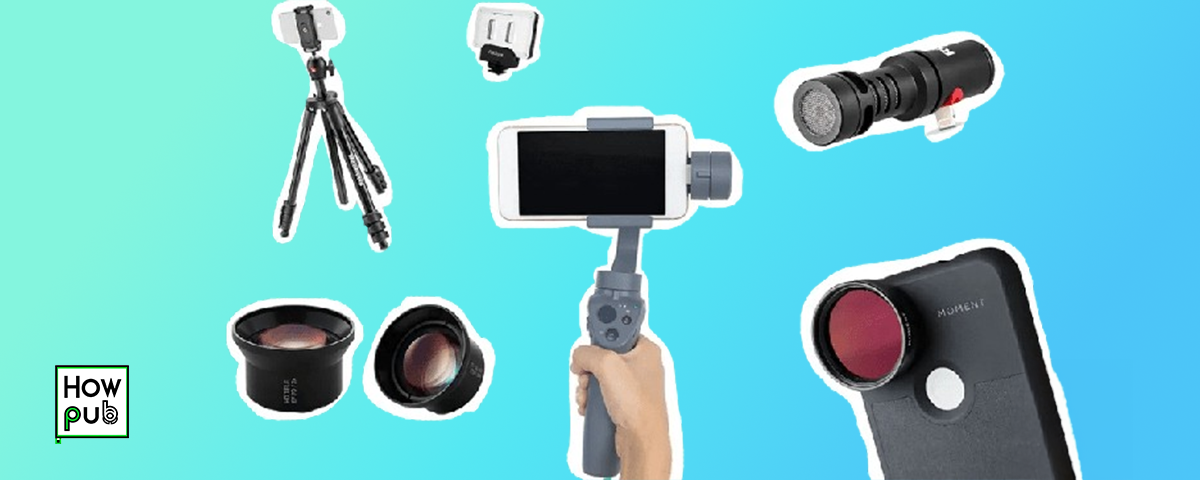
Step 2: Using External Accessories for Professional Quality
External accessories can greatly enhance the quality of your iPhone videography, providing more control and versatility.
Recommended Accessories for Professional Videography

-
Tripods and Stabilizers:
- A tripod or stabilizer is essential for steady shots. The DJI Osmo Mobile is a popular stabilizer that offers smooth tracking and stabilization. For static shots, a sturdy tripod like the Joby GorillaPod provides flexibility in positioning your iPhone.
-
External Microphones:
- Improve your audio quality with an external microphone. The Rode VideoMic Me-L is a compact, directional microphone that connects directly to your iPhone’s Lightning port, offering clear, focused sound.
-
Lighting Kits:
- Good lighting is crucial for professional videography. Use portable LED lights like the Lume Cube to control lighting and eliminate shadows. Adjustable brightness and color temperature give you flexibility in different shooting conditions.
-
Lenses:
- Attach external lenses like the Moment Anamorphic Lens for a wider field of view and cinematic flares. These lenses clip onto your iPhone, providing enhanced capabilities without sacrificing mobility.
-
Gimbals:
- For dynamic shots with smooth movement, use a gimbal like the Zhiyun Smooth 4. Gimbals help stabilize your iPhone during movement, making your videos look more polished and professional.
Step 3: Using Professional Videography Apps
Third-party apps can offer more control and advanced features than the native Camera app, enabling you to fine-tune your video settings.
Best Apps for Professional Videography

-
FiLMiC Pro:
- FiLMiC Pro is a must-have app for professional videography on iPhone. It provides full manual control over focus, exposure, white balance, and frame rate. The app also supports high bit-rate video, ensuring top-notch quality.
-
LumaFusion:
- LumaFusion is a powerful video editing app that allows you to edit your footage directly on your iPhone. It offers multi-track editing, color correction, and advanced effects, making it ideal for post-production on the go.
-
Adobe Premiere Rush:
- Adobe Premiere Rush is another excellent video editing app with a user-friendly interface and powerful tools. It allows you to edit, add effects, and export videos in high quality, with seamless integration into Adobe’s Creative Cloud.
-
ProCamera:
- ProCamera offers advanced shooting features like manual focus, ISO, and shutter speed adjustments, as well as shooting in different formats. This app is ideal for those who want precise control over their video capture.
-
Mavis:
- Mavis is a professional video camera app that provides advanced tools like focus peaking, false color, and audio metering. It’s perfect for filmmakers who need detailed control over their videography.
Step 4: Shooting Techniques for Professional Video
Mastering shooting techniques can significantly improve the quality of your videos, making them look more polished and professional.
Essential Videography Techniques

-
Use the Rule of Thirds:
- Position your subject off-center using the rule of thirds. Aligning your subject along the gridlines helps create a more dynamic and visually appealing composition.
-
Keep the Camera Steady:
- Use a tripod or stabilizer to avoid shaky footage. If you’re shooting handheld, try to keep your movements slow and steady, or brace your iPhone against a solid surface.
-
Experiment with Angles:
- Don’t be afraid to experiment with different angles. Low-angle shots can make your subject appear more powerful, while high-angle shots can create a sense of vulnerability or overview.
-
Focus on Lighting:
- Good lighting is essential for professional-looking video. Always shoot with adequate lighting, and use external lights if necessary. Pay attention to the direction and quality of light to avoid harsh shadows or overexposure.
-
Capture B-Roll Footage:
- B-roll footage is essential for creating more engaging videos. It includes supplementary shots that complement your main footage, such as close-ups, cutaways, or environmental shots.
-
Plan Your Shots:
- Before you start shooting, plan your shots and storyboard your video. This helps you stay organized and ensures you capture all the necessary footage.
Step 5: Editing and Post-Production
Editing is where your video truly comes to life. With the right tools and techniques, you can transform raw footage into a polished final product.
How to Edit Video on Your iPhone

-
Use a Professional Editing App:
- Open your preferred video editing app, such as LumaFusion or Adobe Premiere Rush.
-
Import Footage:
- Import your video clips into the app’s timeline. Organize them in the order you want them to appear in your final video.
-
Trim and Arrange Clips:
- Trim each clip to remove unnecessary parts and arrange them to tell a coherent story. Use cuts, fades, and transitions to create smooth connections between clips.
-
Add Music and Sound Effects:
- Add background music, sound effects, and voiceovers to enhance your video. Ensure that the audio levels are balanced and that the music complements the visual content.
-
Apply Color Correction and Grading:
- Adjust the color balance, contrast, and brightness to achieve the desired look. Color grading can add a cinematic feel to your video, making it look more professional.
-
Export in High Quality:
- When you’re finished editing, export your video in the highest quality available. Select a resolution and frame rate that match your original footage to maintain quality.
Step 6: Sharing and Distributing Your Videos
Once your video is complete, it’s time to share it with the world. There
are several platforms and methods for distributing your content.
How to Share and Distribute Your Videos

-
Upload to Social Media:
- Share your video on social media platforms like Instagram, Facebook, and YouTube. Each platform has its own video format requirements, so ensure your video meets these specifications before uploading.
-
Use Video Hosting Platforms:
- For longer or higher-quality videos, consider using video hosting platforms like Vimeo or YouTube. These platforms offer better support for high-definition videos and provide more options for customization and monetization.
-
Create a Video Portfolio:
- If you’re a professional videographer, create an online portfolio to showcase your work. Use platforms like Behance or Squarespace to build a professional-looking portfolio website.
-
Share via AirDrop or iCloud:
- To quickly share videos with friends, clients, or collaborators, use AirDrop or iCloud. These services allow you to transfer large video files directly between Apple devices.
-
Optimize for SEO:
- If you’re uploading to YouTube or a website, optimize your video title, description, and tags for search engines. This will help your video reach a larger audience.
Conclusion
Your iPhone is a powerful tool for professional videography, offering advanced features and capabilities that can rival traditional cameras. By mastering camera settings, using the right accessories, leveraging professional apps, and applying effective shooting and editing techniques, you can produce high-quality videos that stand out. Whether you’re creating content for social media, marketing, or film production, your iPhone can help you achieve your videography goals with ease.